Brief Overview of the Nostalgia Ice Cream Maker and Why It’s Perfect for Homemade Ice Cream
When it comes to creating delicious, creamy ice cream at home, the Nostalgia ice cream maker recipes stand out as one of the most user-friendly and versatile appliances on the market. This innovative machine allows anyone, regardless of experience level, to churn out professional-quality ice cream, gelato, sorbet, and even frozen yogurt right in their kitchen. Whether you’re crafting a timeless vanilla ice cream or experimenting with unique flavors, the Nostalgia ice cream maker makes the process seamless and enjoyable.
One of the standout features of the Nostalgia ice cream maker is its ease of use. The machine is designed with simplicity in mind, making it accessible for beginners and seasoned dessert enthusiasts alike. From setup to cleanup, the process is straightforward. Most models come with an easy-to-follow instruction manual, pre-measured ingredient slots, and a powerful motor to ensure perfect churning every time. With this machine, there’s no need to fuss over complicated settings or techniques; all you need to do is add your ingredients, start the machine, and wait for the magic to happen.
Another reason the Nostalgia ice cream maker is perfect for homemade ice cream is its versatility. Unlike traditional machines that focus solely on one type of frozen dessert, the Nostalgia maker allows you to create a wide variety of treats. Want a classic vanilla ice cream? No problem. Craving a refreshing fruity sorbet? The Nostalgia maker can handle it effortlessly. The machine is also perfect for making fun, customized flavors, such as cookies and cream, mint chocolate chip, or even birthday cake ice cream. This versatility makes it ideal for catering to different tastes, dietary preferences, and occasions.
For those who love hosting gatherings or celebrating special events, the Nostalgia ice cream maker becomes a must-have tool. Imagine serving freshly made ice cream at a summer barbecue, offering unique flavors at a birthday party, or creating dairy-free sorbets for friends with dietary restrictions. With this machine, the possibilities are endless, and the results are always impressive. Guests will love the novelty of homemade ice cream, and you’ll enjoy the satisfaction of crafting desserts tailored to your preferences.
The purpose of this blog is to help you discover the full potential of the Nostalgia ice cream maker through five foolproof Nostalgia ice cream maker recipes perfect for celebrations. Each recipe has been carefully selected to ensure it’s easy to follow and delivers delicious results. Whether you’re new to making ice cream or looking to expand your repertoire, these recipes will guide you step by step to create crowd-pleasing desserts.
In this blog, you’ll find everything from classic flavors like vanilla and chocolate to more adventurous options like fruity sorbets and party-ready cookies and cream. Each recipe is designed to highlight the versatility of the Nostalgia ice cream maker while encouraging creativity and customization. By the end, you’ll not only have five exciting recipes but also the confidence to experiment with your own unique flavor combinations.
For anyone looking to elevate their dessert game and enjoy the simple pleasures of homemade ice cream, the Nostalgia ice cream maker is the ultimate choice. With its user-friendly features, incredible versatility, and ability to create memorable desserts for any celebration, it’s a worthy addition to any kitchen. Get ready to whip up some magic with our curated list of Nostalgia ice cream maker recipes!
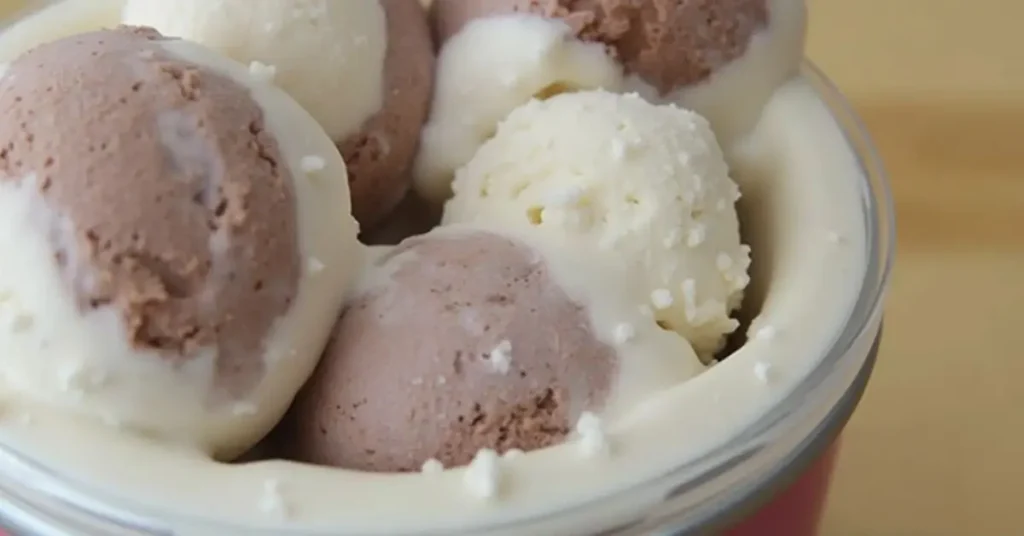
Table of Contents
Ingredients for Nostalgia Ice Cream Maker Recipes:
- Whole Milk or dairy alternatives (e.g., almond milk, coconut milk).
- Heavy Cream or plant-based cream substitutes.
- Granulated Sugar or sweeteners (e.g., honey, maple syrup, or stevia).
- Vanilla Extract or other flavoring agents (e.g., almond extract, mint extract).
- Cocoa Powder or chocolate syrup for chocolate recipes.
- Fresh Fruit (e.g., strawberries, mango, blueberries) for fruity recipes.
- Mix-ins (e.g., crushed cookies, chocolate chips, nuts, sprinkles).
- Salt for recipes requiring a salted flavor profile.
- Optional Add-ins: Caramel swirls, fudge, marshmallows, or brownie chunks.
Essential Ingredients for Nostalgia Ice Cream Maker Recipes
List of Common Ingredients Used in All Recipes
When preparing homemade ice cream with your Nostalgia ice cream maker recipes, using the right ingredients is crucial to achieving a creamy, flavorful, and irresistible dessert. Below, we’ll dive into the essential components that form the foundation of these recipes. Each ingredient plays a significant role in creating the perfect texture and taste.
Milk (Whole Milk or Dairy Alternatives)
Milk is the backbone of most ice cream recipes, providing a creamy base and helping achieve the right consistency. Whole milk is often preferred because its fat content contributes to the rich, smooth texture that makes ice cream irresistible. However, if you’re looking for a lighter option or have dietary restrictions, dairy-free alternatives like almond milk, oat milk, or coconut milk work wonderfully. Keep in mind that plant-based milks can add unique flavors to your ice cream, so choose one that complements your recipe.
Heavy Cream
Heavy cream is a must-have ingredient in any Nostalgia ice cream maker recipes because it delivers the luxurious creaminess that makes homemade ice cream stand out. The fat content in heavy cream gives the dessert its signature richness, ensuring that every bite feels indulgent. For lighter options, half-and-half or a mix of heavy cream and milk can be used, but keep in mind that the texture may be slightly less creamy.
Sugar or Sweeteners
Sugar is not just about sweetness; it also affects the texture and scoopability of your ice cream. Granulated sugar is a standard choice, but other sweeteners, such as honey, maple syrup, or agave, can add depth of flavor. If you’re aiming for a low-sugar or keto-friendly option, consider using stevia, erythritol, or monk fruit sweeteners. Just be sure to adjust the quantity according to your taste and the specific recipe.
Flavoring Agents (Vanilla, Cocoa Powder, Fruit Extracts)
Flavoring agents are what make each recipe unique and exciting. Vanilla extract is a classic option that pairs well with almost any mix-in or topping. Cocoa powder or melted chocolate is perfect for rich, decadent recipes like chocolate ice cream. For fruit-based ice creams, fruit extracts (like strawberry or mango) or even pureed fresh fruit can be used to infuse the dessert with natural flavors. Don’t hesitate to experiment with spices like cinnamon or nutmeg for a creative twist.
Optional Mix-Ins: Cookies, Chocolate Chips, Fruit Chunks
The beauty of homemade ice cream lies in customization. Mix-ins are where you can get creative and elevate your Nostalgia ice cream maker recipes to the next level. Crushed cookies, chocolate chips, brownie chunks, or caramel swirls can add delightful texture and flavor. Fresh fruit chunks, such as strawberries or blueberries, are excellent for a refreshing touch. For nut lovers, toasted almonds, pecans, or walnuts make wonderful additions. Always ensure your mix-ins are bite-sized to evenly distribute them throughout the ice cream.
Importance of Using Fresh and Quality Ingredients
When it comes to creating the best Nostalgia ice cream maker recipes, the quality of your ingredients matters immensely. Fresh milk, cream, and eggs (if used) ensure a superior texture and flavor. Opting for pure vanilla extract rather than imitation enhances the taste significantly. If using fruits, choose ripe and in-season options for the best natural sweetness and flavor. High-quality cocoa powder or chocolate will elevate your chocolate-based recipes, giving them a rich and intense taste.
Not only does using fresh ingredients enhance the flavor, but it also aligns with the core appeal of homemade ice cream: knowing exactly what goes into your dessert. By avoiding artificial additives or preservatives, you can create treats that are healthier, tastier, and perfect for sharing with family and friends.
How to Use the Nostalgia Ice Cream Maker
Setting It Up: Step-by-Step Guide to Assembling the Ice Cream Maker
Before you dive into creating your Nostalgia ice cream maker recipes, it’s essential to properly set up the machine. Here’s a simple guide:
- Unbox and Inspect: Start by unboxing your ice cream maker. Ensure all the parts are present, including the bowl, paddle, lid, and motor base. Check the user manual for your specific model for guidance.
- Assemble the Bowl and Paddle: Place the pre-frozen bowl into the motor base. Insert the paddle into the center of the bowl, ensuring it fits securely. The paddle is key for churning your ingredients into creamy ice cream.
- Secure the Lid: Once the bowl and paddle are in place, attach the lid to the top. Make sure it clicks into place to avoid any spillage during the churning process.
- Plug It In: Finally, plug the machine into a power outlet, and you’re ready to start churning out delicious Nostalgia ice cream maker recipes.
Pre-Freezing the Bowl: Why Chilling the Bowl Overnight Is Crucial
One of the most important steps in making perfect Nostalgia ice cream maker recipes is pre-freezing the bowl. Here’s why this step is non-negotiable:
- Ensures Proper Freezing: The bowl contains a freezing gel that needs to be fully solidified to churn ice cream effectively. Freezing it overnight (or at least for 12 hours) allows the gel to reach the optimal temperature.
- Prevents Melting: If the bowl isn’t cold enough, the ice cream mixture may start to melt during the churning process, resulting in a runny texture instead of creamy ice cream.
- Consistency Matters: A properly frozen bowl ensures that your ingredients freeze evenly as they churn, creating the smooth, creamy texture you expect from homemade ice cream.
Tip: Always store the bowl in the back of your freezer, where it’s coldest. If you plan to make ice cream regularly, keep it in the freezer so it’s ready whenever inspiration strikes!
Churning Tips: Proper Timing and Consistency for the Perfect Ice Cream
Churning is where the magic happens, transforming simple ingredients into delectable Nostalgia ice cream maker recipes. Follow these tips for the best results:
- Pour Ingredients While the Machine Is Running: To prevent the mixture from freezing to the sides of the bowl, start the machine before pouring your ingredients. This allows the paddle to distribute the mixture evenly from the start.
- Churn for the Right Amount of Time: Most recipes take about 20–30 minutes. Keep an eye on the texture—once the mixture thickens and reaches a soft-serve consistency, it’s ready.
- Avoid Overloading the Machine: Stick to the manufacturer’s recommended capacity. Overfilling can lead to spillage or uneven freezing.
- Add Mix-Ins at the Right Time: For recipes with mix-ins like chocolate chips or fruit chunks, add them during the last 5 minutes of churning to ensure even distribution without overmixing.
Cleaning the Machine: Quick Tips to Keep Your Nostalgia Maker in Top Condition
Cleaning your ice cream maker after preparing your Nostalgia ice cream maker recipes is crucial for hygiene and longevity. Follow these steps:
- Unplug and Disassemble: Once you’ve finished making ice cream, unplug the machine and carefully disassemble the parts. Remove the paddle, bowl, and lid for cleaning.
- Wash Removable Parts: Wash the bowl, paddle, and lid with warm, soapy water. Avoid using abrasive sponges, as they can damage the bowl’s surface. Rinse thoroughly and let the parts air dry.
- Clean the Motor Base: Use a damp cloth to wipe down the motor base. Never immerse it in water, as this can damage the electrical components.
- Store Properly: Once dry, store the components in a clean, dry place. If you plan to use the machine frequently, keep the bowl in the freezer so it’s always ready.
By following these steps, you’ll keep your machine in excellent condition, ensuring it’s ready to whip up more delicious Nostalgia ice cream maker recipes anytime you want.
Classic Nostalgia Ice Cream Maker Recipes
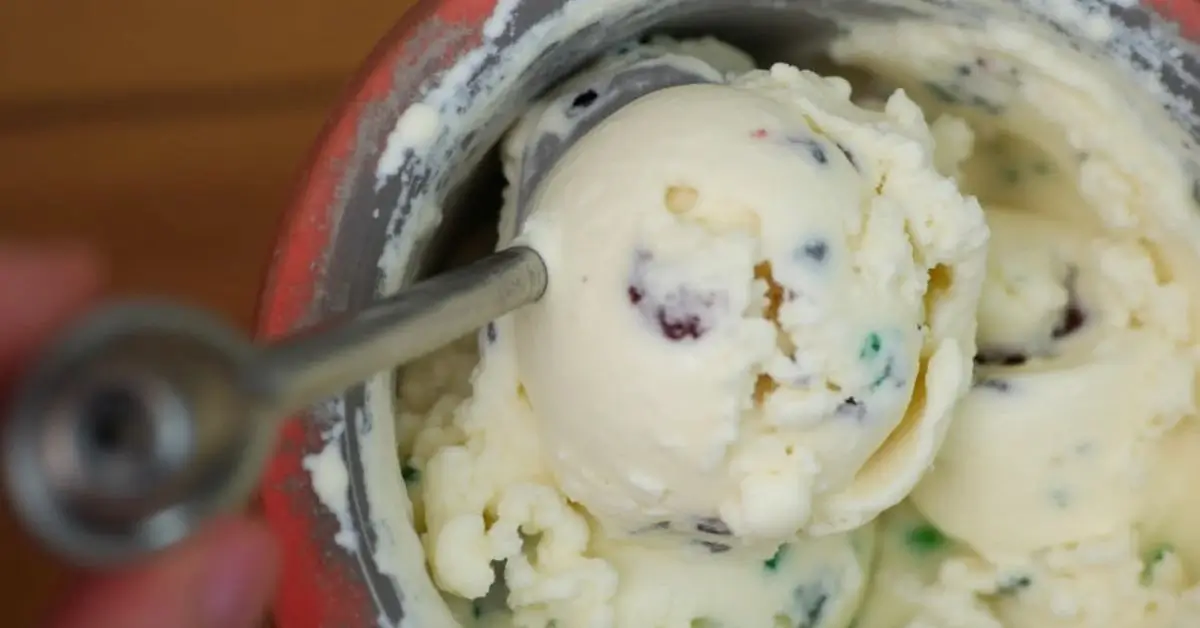
1. Creamy Vanilla Ice Cream
The classic vanilla ice cream is a timeless treat that never goes out of style. It’s smooth, creamy, and the perfect base for countless customizations. With the Nostalgia ice cream maker recipes, creating this favorite dessert is simple and rewarding.
Ingredients
- 2 cups heavy cream
- 1 cup whole milk
- ¾ cup granulated sugar
- 2 teaspoons pure vanilla extract
Step-by-Step Instructions
- Combine Ingredients: In a mixing bowl, whisk together heavy cream, milk, sugar, and vanilla extract until the sugar fully dissolves.
- Pre-Chill the Mixture: Cover the bowl with plastic wrap and refrigerate for 1–2 hours to enhance flavor and ensure optimal churning.
- Pour into the Nostalgia Ice Cream Maker: Once chilled, pour the mixture into the pre-frozen bowl of your ice cream maker.
- Churn: Follow the manufacturer’s instructions for your Nostalgia machine. It usually takes about 20–30 minutes.
- Freeze for Firmer Ice Cream: If you prefer firmer ice cream, transfer it to an airtight container and freeze for an additional 1–2 hours before serving.
Add-Ons
Take this classic recipe to the next level by swirling in chocolate syrup, caramel sauce, or adding sprinkles before the final freeze.
2. Rich Chocolate Ice Cream
For chocolate lovers, this decadent chocolate ice cream is a dream come true. The combination of cocoa powder and chocolate syrup makes this recipe indulgent and irresistible.
Ingredients
- 2 cups heavy cream
- 1 cup whole milk
- ¾ cup granulated sugar
- ⅓ cup unsweetened cocoa powder
- ½ cup chocolate syrup
Step-by-Step Instructions
- Mix Dry Ingredients: In a mixing bowl, sift together the cocoa powder and sugar to avoid lumps.
- Combine Liquids: Gradually whisk in the milk, followed by the heavy cream and chocolate syrup, until fully blended.
- Chill: Refrigerate the mixture for 1–2 hours to ensure proper churning.
- Churn in the Nostalgia Ice Cream Maker: Pour the mixture into the machine and churn for about 25–30 minutes.
- Optional Add-Ins: For a fun twist, add brownie chunks or marshmallows halfway through churning.
Serving Suggestion
Garnish with whipped cream and chocolate shavings for a finish.
3. Fruity Sorbet
Looking for a light and refreshing treat? This fruity sorbet recipe is the perfect dairy-free alternative to traditional ice cream. It’s simple to prepare and showcases the natural sweetness of fresh fruit.
Ingredients
- 2 cups fresh fruit (e.g., mango, strawberries, or lemons)
- ¾ cup granulated sugar
- 1 cup water
- 1 tablespoon lemon juice (optional, for extra tartness)
Step-by-Step Instructions
- Prepare the Fruit: Wash, peel, and dice the fruit. For berries, remove any stems.
- Create the Syrup: Heat sugar and water in a small saucepan over medium heat until the sugar dissolves. Let it cool.
- Blend: Combine the fruit, cooled syrup, and lemon juice in a blender. Blend until smooth.
- Strain (Optional): For a smoother texture, strain the mixture to remove pulp or seeds.
- Churn: Pour the mixture into the Nostalgia ice cream maker and churn for 20–25 minutes.
Serving Tips
Serve with fresh fruit slices or garnish with mint leaves for a colorful, festive look.
Advanced and Fun Ice Cream Recipes for Celebrations
4. Cookies and Cream Ice Cream
Transform a vanilla base into a delightful cookies and cream ice cream that’s perfect for kids and parties.
- Ingredients: Prepare a vanilla base and add 1 cup of crushed chocolate sandwich cookies.
- Instructions: Add the cookie crumbs in the last 5 minutes of churning to ensure even distribution.
- Pro Tip: Save some cookie chunks for topping before serving.
5. Mint Chocolate Chip Ice Cream
This mint chocolate chip ice cream balances refreshing mint with rich chocolate flavors.
- Ingredients: 1 teaspoon fresh mint extract, 1 cup chocolate chips, and a vanilla base.
- Instructions: Add the mint extract to the vanilla mixture before churning. Fold in chocolate chips in the final 5 minutes.
- Serving Suggestion: Garnish with fresh mint leaves for a sophisticated touch.
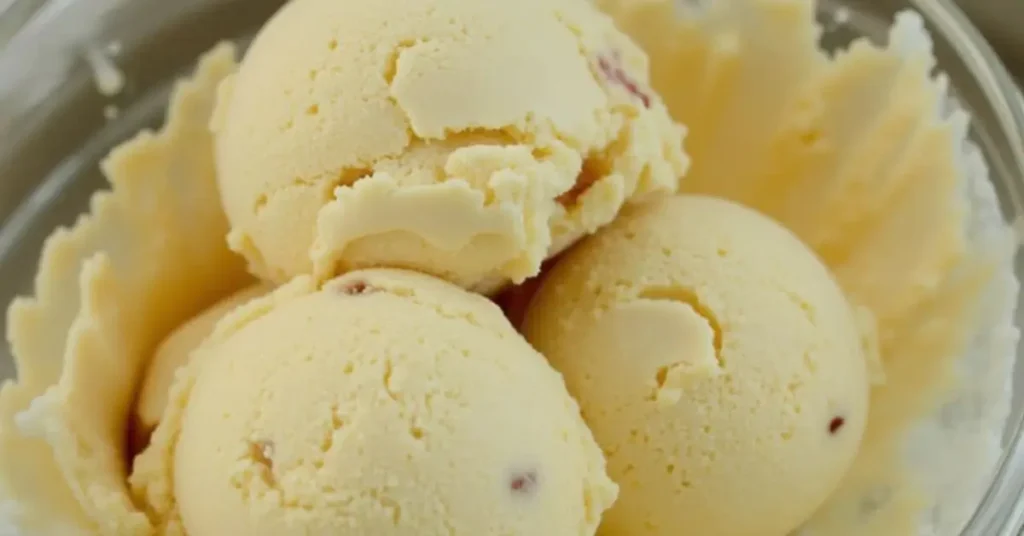
6. Birthday Cake Ice Cream
Celebrate any occasion with this fun birthday cake ice cream.
- Ingredients: ½ cup cake mix, ½ cup sprinkles, and a vanilla base.
- Instructions: Mix the cake mix into the vanilla base before churning. Fold in the sprinkles during the last 5 minutes.
- Tip: Serve in colorful cones to enhance the festive vibe.
Advanced and Fun Ice Cream Recipes for Celebrations
4. Cookies and Cream Ice Cream
Ingredients: Vanilla base and crushed chocolate cookies
One of the most beloved ice cream flavors, cookies and cream ice cream has the perfect balance of creamy sweetness and a satisfying crunch. Making this treat with your Nostalgia ice cream maker is incredibly easy. Start with a simple vanilla ice cream base, and the magic happens when you add crushed chocolate cookies, which give it that signature flavor and texture. You can use any chocolate sandwich cookies, but the classic choice is Oreo cookies for their rich flavor and texture.
Guide to incorporating the cookies perfectly
The key to perfect cookies and cream ice cream lies in how you mix the cookies into your vanilla ice cream base. After preparing the vanilla mixture and churning it in your Nostalgia ice cream maker, add the crushed cookies in the final stages of churning. This ensures that the cookies are evenly distributed throughout the ice cream while maintaining their distinct crunch. You can crush the cookies by hand or pulse them in a food processor—just be careful not to grind them into dust. Larger chunks work best for texture, so aim for medium-sized pieces that will add a satisfying crunch when eaten.
You can also add some extra crushed cookies on top once the ice cream has finished churning, creating pockets of cookie goodness that will surprise and delight you with every bite. Another option is to fold in chocolate syrup or fudge for an even richer experience. The beauty of Nostalgia ice cream maker recipes is that you can experiment and adjust the texture and flavor according to your taste!
Perfect for kids and parties
This recipe is a great choice for family gatherings or parties. Kids love the combination of creamy ice cream with crunchy cookie bits, making it a hit at any celebration. You can even personalize it by offering toppings like whipped cream, chocolate sauce, or even extra crushed cookies on the side. Whether you’re serving it at a birthday party or an afternoon barbecue, cookies and cream ice cream made with your Nostalgia ice cream maker is sure to be the star of the show.
5. Mint Chocolate Chip Ice Cream
Ingredients: Fresh mint extract, chocolate chips, milk, and cream
Mint chocolate chip ice cream is another classic that’s easy to make in your Nostalgia ice cream maker. It’s refreshing, creamy, and the perfect combination of cool mint and rich chocolate. The base is made from the usual ingredients—milk, cream, and sugar—but the real magic happens with the addition of fresh mint extract and chocolate chips. Fresh mint extract gives the ice cream a natural, vibrant flavor that pairs beautifully with the smooth creaminess of the ice cream. For an extra minty kick, you can even steep fresh mint leaves in milk and cream before mixing it with the sugar.
Steps for achieving the perfect balance of mint and chocolate
Achieving the perfect balance of mint and chocolate in your Nostalgia ice cream maker recipes is key to making a delicious mint chocolate chip ice cream. To get this just right, add the mint extract gradually. Always begin with a modest portion—taste and tweak the blend as you go before adding more to perfect the flavor. Fresh mint extract can be quite potent, so be cautious not to overdo it. After churning the ice cream base in the Nostalgia ice cream maker, fold in the chocolate chips. You can use either semi-sweet or dark chocolate chips, depending on your preference for a sweeter or more bitter flavor. For a smoother texture, you can melt some chocolate and drizzle it into the churning ice cream to create a swirled effect.
Presentation tip: Garnish with fresh mint leaves
To make your mint chocolate chip ice cream extra special, garnish it with fresh mint leaves right before serving. The mint leaves not only add a beautiful green touch to the ice cream but also enhance the fresh mint flavor. A few leaves on top of each bowl or cone can make your homemade mint chocolate chip ice cream look and taste even more refreshing. This ice cream is perfect for hot summer days or a festive treat for any celebration.
6. Birthday Cake Ice Cream
Ingredients: Cake mix, sprinkles, milk, and cream
What better way to celebrate than with birthday cake ice cream? This fun and festive treat takes the nostalgic flavor of birthday cake and transforms it into a creamy, frozen dessert. The main ingredients for this ice cream are cake mix, sprinkles, milk, and cream. To create the “birthday cake” flavor, you’ll start by adding the dry cake mix (vanilla or funfetti works best) into the ice cream base, then blend it with milk and cream. The cake mix adds a subtle sweetness and the flavor of baked cake batter, creating a delightful, creamy ice cream that’s perfect for birthday parties or any celebratory event.
How to recreate the nostalgic flavor of birthday cake in ice cream form
The magic of birthday cake ice cream comes from the cake mix itself. You’ll add a small amount of the mix to your base to get the cake flavor without making it too overpowering. Stir in some sprinkles before the ice cream starts to freeze to create bursts of color and that festive birthday look. As the ice cream churns in the Nostalgia ice cream maker, the sprinkles will spread out evenly, adding a fun crunch and pop of color throughout the mixture. You can also add extra sprinkles on top of the ice cream before serving for an extra celebration touch!
For a fun twist, consider adding small chunks of real birthday cake to the ice cream base as it finishes churning, making this treat even more indulgent. This version of Nostalgia ice cream maker recipes will bring back the nostalgia of childhood birthday parties, with every bite reminiscent of sweet birthday cake with a creamy, frozen twist.
Perfect for any celebration
This is the perfect ice cream for birthday parties, but it can also be enjoyed year-round for any celebration. The combination of cake flavor, sprinkles, and creamy texture makes it an irresistible dessert for both kids and adults. Whether you’re serving it in cones, bowls, or as a topping for other desserts, birthday cake ice cream is a fun and nostalgic treat that will be a big hit at any event.
FAQ: Common Questions About Nostalgia Ice Cream Maker Recipes
How long does it take to make ice cream in a Nostalgia maker?
Typically, it takes 20–30 minutes to make ice cream in the Nostalgia ice cream maker. However, the exact time can vary depending on the specific recipe and the desired consistency of the ice cream. For example, if you’re making a Nostalgia ice cream maker recipe like classic vanilla, the churning time may be shorter compared to richer, more complex recipes like chocolate or cookies and cream.
The temperature of the mixture also plays a role. If your ice cream base is already chilled, it will churn faster in the Nostalgia ice cream maker, whereas warmer mixtures might take a bit longer to thicken.
It’s important to keep an eye on the ice cream as it churns, checking for the right consistency. The ice cream is done when it thickens to a soft-serve texture. For firmer ice cream, you can transfer it to an airtight container and freeze it for a couple of hours after churning.
Do I need to pre-freeze the bowl?
Yes, pre-freezing the bowl is absolutely essential for getting the best results with Nostalgia ice cream maker recipes. The bowl needs to be frozen for at least 12–24 hours before you begin making ice cream. This ensures that the base freezes properly during the churning process, allowing the mixture to solidify and develop a creamy texture.
Without pre-freezing the bowl, the Nostalgia ice cream maker won’t be able to chill the ice cream base quickly enough, and the result will be more like a slush than smooth, creamy ice cream. The bowl is designed to freeze and release the cold as the ice cream churns, so giving it ample time to chill is key for the best texture.
Can I use dairy-free ingredients in these recipes?
Absolutely! Nostalgia ice cream maker recipes are versatile and can easily be made dairy-free. Simply substitute regular milk and cream with dairy-free alternatives such as coconut milk, almond milk, or oat milk. These plant-based milks provide similar textures to dairy milk and work well for both creamy and fruity ice cream recipes.
For added richness, consider using coconut cream instead of regular cream, as it adds a velvety smooth texture to the ice cream. If you’re making a recipe that calls for heavy cream, you can swap it with a full-fat coconut milk or even a combination of coconut milk and cashew milk for a creamy result. Many Nostalgia ice cream maker recipes can be adapted for vegan diets, just be sure to check any additional ingredients like flavorings or sweeteners to ensure they align with your dietary preferences.
How do I store leftover ice cream?
To store leftover ice cream made with your Nostalgia ice cream maker recipes, place it in an airtight container and store it in the freezer. Proper storage is crucial to keep the ice cream fresh and prevent freezer burn. When sealed correctly, homemade ice cream can be stored for up to a week.
However, keep in mind that the texture of homemade ice cream can change after it freezes for longer periods. For the best texture, it’s recommended to consume it within a few days of making it. To serve the ice cream, simply let it sit at room temperature for a few minutes to soften before scooping.
If you’re looking to keep the texture smooth and avoid ice crystals forming, you can also place a layer of wax paper or plastic wrap directly on the surface of the ice cream before sealing the container.
Conclusion
Recap the Ease and Versatility of Making Homemade Ice Cream with Nostalgia Ice Cream Maker Recipes
Making homemade ice cream has never been easier or more fun, thanks to Nostalgia ice cream maker recipes. Whether you’re a beginner or a seasoned ice cream maker, this user-friendly appliance provides the perfect opportunity to craft delicious frozen treats right in your kitchen. The Nostalgia ice cream maker eliminates the guesswork with its straightforward setup and clear instructions, making it a must-have for anyone looking to enjoy fresh, customizable ice cream.