What’s the secret to turning any ordinary party into a fun-filled, dinosaur-themed celebration? The answer is simple: Dino Jello Cups Recipe! These colorful, wobbly treats are not only eye-catching and delicious but also perfect for making lasting memories at kids’ birthdays, family gatherings, or any event that calls for a playful twist.
If you’ve ever struggled to find a recipe that’s both entertaining and easy to make, then this is your solution! The Dino Jello Cups Recipe requires just a handful of ingredients, a little creativity, and in less than two hours, you’ll have a fun treat that everyone will love.
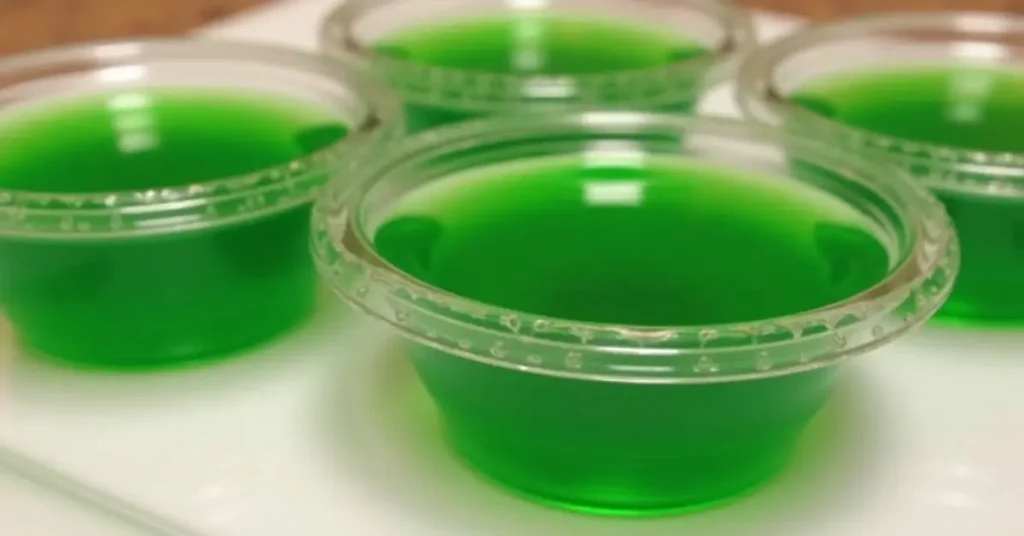
Table of Contents
Why You’ll Love Dino Jello Cups:
- Kid-Friendly & Fun: Dinosaur-themed snacks are always a hit! The vibrant, wobbly layers of jello and cute gummies will have the little ones excited and ready for snack time.
- Quick & Easy: With only a short prep time and no cooking required, this Dino Jello Cups Recipe is perfect for busy parents and party planners. You can even get the kids involved in making their own personalized cups.
- Healthier Twist: Looking to make your Jello cups a little healthier? Swap out the sugar-laden gelatin for sugar-free options or use 100% fruit juice for a more natural flavor. By choosing natural ingredients, you can serve a guilt-free treat that’s still packed with fun.
Versatile Recipe for Any Occasion
The real magic? This recipe bends to your whims! Swap ingredients, tweak flavors, or adjust textures—it’s a culinary chameleon ready to match your mood, pantry, or dietary needs. Whether you’re celebrating a dinosaur-themed birthday, hosting a family get-together, or simply craving a vibrant dessert for any occasion, these Dino Jello Cups fit the bill. You can customize the flavors, add different colors, or mix in fun toppings like whipped cream or additional fruit to suit your taste.
This isn’t just a snack – it’s an interactive treat that encourages creativity, and your guests will enjoy every bite! The Dino Jello Cups Recipe is also easy to store, making them a perfect make-ahead option for busy event planners or parents on the go.
What Makes This Dino Jello Cups Recipe Special
The Dino Jello Cups Recipe stands out for its simplicity, creativity, and versatility, making it the perfect treat for any occasion. Whether you’re throwing a dinosaur-themed party, celebrating a birthday, or just looking for a fun and colorful snack, this recipe has you covered. Let’s dive into what makes this recipe so special and why it’s a must-try for your next event!
Quick Preparation & Easy Steps
One of the best features of the Dino Jello Cups Recipe is how quickly it comes together. Despite looking like a dessert fit for a special occasion, this recipe is incredibly easy to prepare and requires no cooking. You’ll only need a few minutes of prep time to mix your ingredients and a bit of patience as the jello sets.
- Prep Time: Just 15 minutes
- Setting Time: 2 hours (or longer if you prefer to prepare it ahead of time)
- No cooking required: Simply mix, layer, and refrigerate!
Difficulty Level
This recipe is incredibly beginner-friendly, which means anyone, even kids, can get involved in making their own personalized Dino Jello cups. No baking skills are necessary – just a love for fun, creative snacks! Whether you’re hosting a big party or just making a small batch, this treat is simple and manageable for anyone to prepare.
- Easy to Follow: With just a few basic ingredients and simple steps, you’ll have this fun snack ready in no time.
- Perfect for All Ages: Kids love getting involved in the layering process, while adults can add their creative touches with extra ingredients like whipped cream or fruit.
Health Benefits & Customization
While the Dino Jello Cups Recipe is a playful treat, it can also be made with healthier alternatives. By swapping out regular gelatin for sugar-free gelatin or using fruit juice instead of sugary drinks, you can create a treat that’s lighter while still full of flavor. This flexibility makes it easier to fit into a range of diets and preferences.
- Healthier Options: Use sugar-free gelatin or 100% fruit juice to reduce sugar content.
- Customizable for Dietary Needs: You can make this dessert suitable for vegetarian or gluten-free diets with simple swaps like agar-agar for gelatin.
Why It’s a Versatile Recipe
The versatility of the Dino Jello Cups Recipe is what truly sets it apart. You can easily adjust the colors, flavors, and toppings based on your theme or personal preferences.
- Color & Flavor Variety: Mix and match different Jello flavors to create a rainbow effect, or choose a theme that matches your party (e.g., green and yellow for a dinosaur party).
- Fun Toppings: From whipped cream to gummy dinosaurs or fresh fruit, you can decorate these cups however you like, adding both taste and visual appeal.
This recipe is truly customizable, ensuring that it’s perfect for any event, whether it’s a fun family get-together or a special occasion. Plus, it’s a treat that will appeal to both kids and adults alike, making it a hit at any party!
Key Components for the Dino Jello Cups Recipe
The success of any recipe lies in its ingredients, and the Dino Jello Cups Recipe is no exception! This fun and vibrant treat requires just a handful of basic components that come together to create a playful and tasty dessert. Below are the essential ingredients, their roles in the recipe, and options for substitutions to suit your preferences.
1. Flavored Gelatin (Jello)
Why it’s important: The colorful layers of Jello are the heart of this recipe. Flavored gelatin is what gives the cups their vibrant colors and delicious fruity taste. It’s also what makes the jello “wiggle” and “wobble,” making it a fun treat to eat and look at!
- Substitutions: If you’re looking for a sugar-free or low-sugar version, you can use sugar-free Jello or opt for fruit-flavored gelatin without added sugar.
- Variations: Want a specific theme? Choose Jello flavors and colors that match your party! For a green dinosaur theme, use lime Jello, and for a yellow dino theme, try lemon Jello.
2. Boiling Water
Why it’s important: Boiling water helps dissolve the gelatin powder, ensuring the Jello sets perfectly and evenly. This step is crucial for achieving the smooth, wobbly texture that defines the recipe.
- Substitutions: You could substitute boiling water with hot fruit juice (e.g., apple or orange juice) to add a different flavor. Just make sure the liquid is hot enough to dissolve the gelatin.
3. Cold Water
Why it’s important: Cold water is added to the gelatin mixture to help it cool down and set correctly. It also balances out the temperature, ensuring the Jello solidifies to the perfect texture.
- Substitutions: If you want to get creative, you can use cold coconut water or cold fruit juice for an extra flavor twist!
4. Dinosaur Gummies or Candy
Why it’s important: The fun factor of the Dino Jello Cups Recipe is brought to life with dinosaur-shaped gummies or candy. These little creatures will make your cups even more fun and exciting for kids and adults alike.
- Substitutions: If you can’t find dinosaur gummies, use gummy bears, gummy worms, or any other candy that suits your theme. For a healthier option, try using freeze-dried fruit or edible sugar-free gummies.
5. Whipped Cream (Optional)
Why it’s important: Whipped cream adds a touch of creamy sweetness and enhances the dessert’s visual appeal, making it look even more irresistible. It pairs perfectly with the wobbly texture of the gelatin for a fun contrast.
- Substitutions: You can replace whipped cream with whipped coconut cream for a dairy-free option. Or, if you’re aiming for a lower-calorie dessert, you could use light whipped cream or even Greek yogurt for a tangy twist!
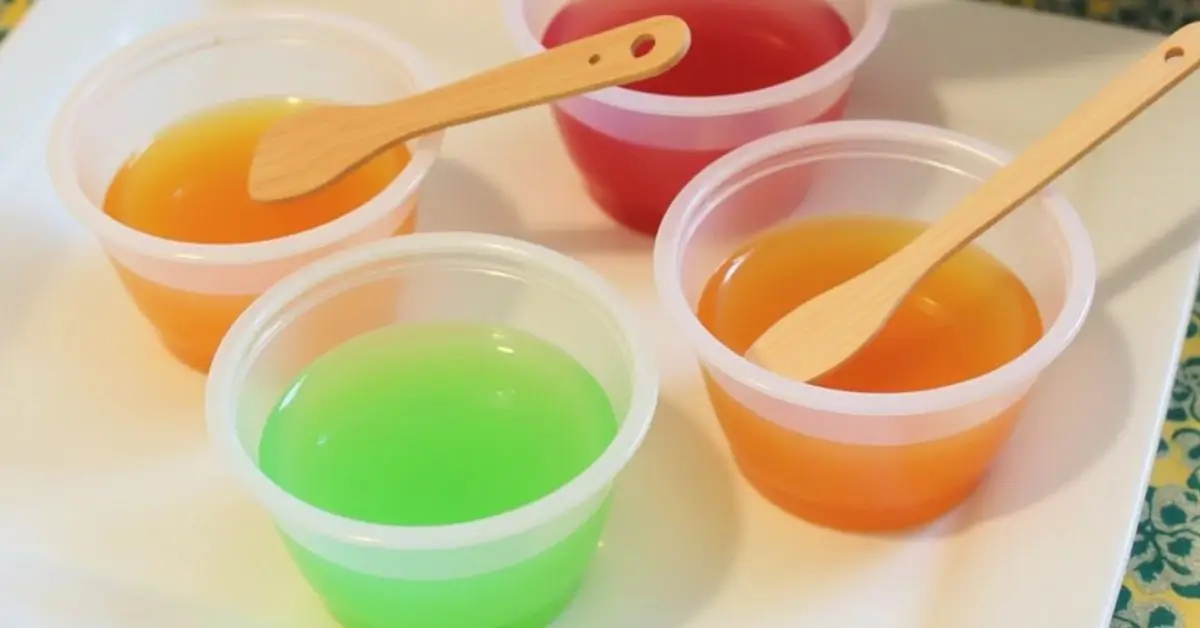
6. Clear Plastic Cups
Why it’s important: The clear cups allow the beautiful layers of the Dino Jello Cups Recipe to shine through. They also make the gelatin look even more vibrant and playful.
- Substitutions: You could also use small mason jars, mini glass cups, or even plastic shot glasses to create a more festive presentation. If you’re serving these at a larger event, disposable plastic cups are an easy and practical option.
Healthier Substitutions & Variations
While the Dino Jello Cups Recipe is already a fun treat, you can make it even healthier by choosing more nutritious ingredients. Here are some great options:
- Healthier Gelatin: Swap traditional gelatin for agar-agar, a plant-based gelatin made from seaweed, for a vegetarian-friendly alternative.
- Juice-Based Gelatin: Use 100% fruit juice instead of artificially flavored gelatin for a more natural, refreshing taste. This also adds a bit of extra vitamin C.
- Lower Sugar: Use sugar-free gelatin or reduce the amount of sweetener if you’re aiming for a lighter dessert option.
- Dairy-Free Option: If you’re serving guests who are dairy-free, coconut cream can be used instead of whipped cream, or you can skip the cream altogether and top with fruit or other fun toppings.
By using these ingredients, the Dino Jello Cups Recipe comes together quickly and easily while allowing plenty of room for creativity and customization. Whether you stick to the classic ingredients or try out a few fun substitutions, this treat can be made to suit your taste and dietary needs. Let your creativity run wild – the possibilities are endless!
Step-by-Step Instructions: How to Prepare the Dino Jello Cups Recipe
Ready to make your own Dino Jello Cups Recipe? This fun and easy dessert comes together in just a few simple steps, and with a little patience, you’ll have a treat that’s both colorful and delicious! Follow these clear instructions, and enjoy the process of creating these fun, wobbly cups.
Ingredients Recap:
- Flavored Gelatin (Jello) – Any flavor of your choice
- Boiling Water
- Cold Water
- Dinosaur Gummies or Candy
- Whipped Cream (Optional)
- Clear Plastic Cups
Step 1: Prepare the Jello Base
The first step in making your Dino Jello Cups Recipe is to prepare the gelatin. Choose a flavor of gelatin that fits your theme (e.g., green lime for a dinosaur look).
- Boil water: In a mixing bowl, pour in the boiling water.
- Add Jello powder: Stir in the gelatin powder and mix until it is fully dissolved.
- Add cold water: Once the gelatin is dissolved, add the cold water and stir again.
- Let it cool: Allow the mixture to cool slightly before proceeding to the next step.
Step 2: Layer the Gelatin in the Cups
To create the layered effect, you’ll need to add the gelatin mixture to the cups in stages.
- Pour a small amount of Jello: Pour a thin layer of Jello into the bottom of each clear plastic cup. The thickness of the layers depends on your preference – thicker layers will take longer to set.
- Chill the first layer: Place the cups in the refrigerator for about 30 minutes, or until the gelatin has set. This step is crucial for creating distinct layers in the final product.
- Add the second layer: After the first layer has set, carefully pour in another layer of gelatin. You can use a different flavor or color for contrast.
- Repeat layers: Continue layering until you’ve filled up the cups, leaving some space at the top for toppings. Allow each layer to set in the fridge for at least 30 minutes before adding the next one.
Tip: If you want to create a beautiful ombre effect, pour a small amount of Jello and let it set before adding another layer with a different shade.
Step 3: Add Dino Gummies or Candy
Once your layers have set and your cups are ready to be decorated, it’s time to add the dinosaur touch!
- Place a gummy dino: When the gelatin layers have fully set, gently place a gummy dinosaur or candy on top of the Jello. The candy should sit on the surface, but you can lightly press it into the gelatin to make it stick better.
- Decorate the top: If you want to add more visual appeal, sprinkle some extra candy or fruit on top, or you can go for a whipped cream crown for extra flavor.
Step 4: Refrigerate and Set
Once you’ve added your dinosaurs and decorations, it’s time to let the Dino Jello Cups Recipe set one final time.
- Chill the cups: Place the cups back in the refrigerator and let the gelatin set for at least 2 hours. You can even leave them overnight for a perfectly firm and wobbly texture.
Step 5: Serve and Enjoy!
After the Jello has fully set, your fun, colorful, and playful Dino Jello Cups Recipe is ready to serve. Carefully remove the cups from the fridge and enjoy!
- Optional garnish: Add a final sprinkle of whipped cream or fresh fruit if you like.
- Enjoy the fun: Dig in and watch as the layers wiggle and the gummy dinosaurs take center stage in each cup.
Cooking Tips & Techniques for Success
Serve with fun toppings: Top your cups with whipped cream, fresh fruit, or even sprinkles to make them even more festive!
Use clear cups: The key to making the Dino Jello Cups Recipe stand out is using clear plastic cups, allowing the beautiful layers to shine through.
Patience is key: Let each layer set completely before adding the next to ensure distinct, vibrant layers. If you rush, the colors may bleed into each other, ruining the layered effect.
Temperature matters: Make sure the gelatin isn’t too hot when pouring into cups, as that could cause the candy or gummies to melt.
How to Build the Dino Jello Cups Recipe & Presentation Tips
Assembling your Dino Jello Cups Recipe is the fun part! Once you’ve prepared the layers and selected your ingredients, it’s time to put everything together. With a few simple steps, you’ll have an eye-catching and delicious dessert that’s sure to impress.
Step 1: Layering the Gelatin
The key to a visually stunning Dino Jello Cups Recipe is layering your gelatin in a way that’s both fun and creative.
- Start with the base layer: After preparing your gelatin, start by pouring the first layer into your clear plastic cups. It’s important to let this layer set for about 30 minutes before moving on to the next layer to ensure it has time to firm up.
- Vary the flavors and colors: You can use different flavors and colors of Jello to create a vibrant, colorful effect. For example, green lime Jello pairs well with orange or yellow for a fun contrast.
- Be patient between layers: Allow each layer to set before adding the next. This prevents the colors from blending into one another and keeps the layers distinct and appealing.
- Use a spoon for precision: When adding the Jello mixture, use a spoon to pour gently into the cups. This helps avoid splashing and ensures a neat presentation.
Step 2: Adding the Dino Gummies
The dino gummies or candy add the perfect playful touch to your Dino Jello Cups Recipe. These little treats are what make the dessert not only delicious but also exciting for kids (and adults who are young at heart!).
- Place the gummies at the top: After the gelatin layers have set completely, it’s time to add your gummies. Gently press a gummy dinosaur into the top layer of Jello. If you’d like, you can make the gummies appear as if they’re “sitting” on top or partially submerged in the Jello for added fun.
- Create a scene: You can get creative by arranging the gummies in different patterns—perhaps a few gummies on one cup or a “dino park” theme with several gummies scattered around.
- Toppings: For a more personalized touch, consider adding whipped cream or other toppings around the gummies to make the dessert feel like a real celebration.
Step 3: Presentation Tips for Your Dino Jello Cups Recipe
Presentation is key to making this recipe a showstopper. Here are a few ideas to enhance the visual appeal of your Dino Jello Cups Recipe:
- Serve in clear cups: Always use clear plastic or glass cups to showcase the beautiful layers of gelatin. This allows the vibrant colors to shine through, adding a pop of excitement to your presentation.
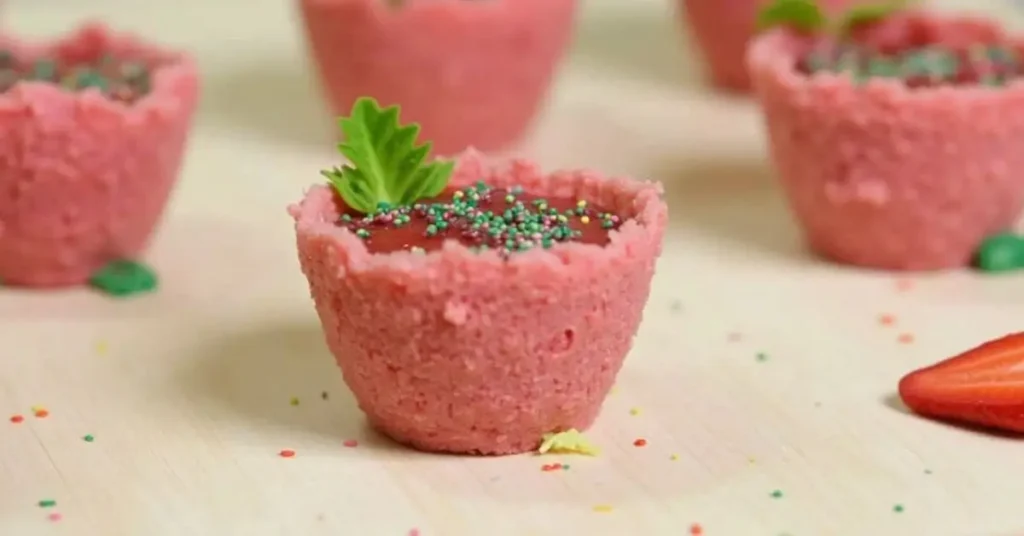
- Garnish creatively: Besides the dino gummies, you can garnish the cups with colorful sprinkles, edible glitter, or a drizzle of whipped cream. A few mint leaves or small candies also make great, vibrant decorations.
- Use themed serving dishes: If you’re serving these at a party or special event, consider placing your cups on a fun-themed tray. For a dinosaur party, a tray with dinosaur footprints or a “dino dig” theme would add a lot of character.
- Keep it fun: Don’t be afraid to get playful with your garnishes and toppings! You can even top the gelatin cups with a sprinkle of crushed graham crackers for a “dino dirt” effect or use gummy worms to represent the environment dinosaurs lived in.
Step 4: Let the Jello Cups Set
Once the layers and gummies are in place, your Dino Jello Cups Recipe just needs a little more time to set. Refrigerate the cups for at least two hours to ensure the gelatin is firm and the candies stay in place.
Helpful Tips for Assembly Success
- Allow time for each layer to set: Be patient with the setting process. Allowing each layer to firm up ensures a perfect, clean finish and prevents the layers from mixing.
- Make it a fun activity: Get the kids involved in assembling the cups. They’ll love adding their favorite gummy dinosaurs and sprinkles!
- Personalize the cups: You can tailor the flavor and color combinations based on the occasion. For example, for a party, you might use rainbow-colored layers or choose flavors that match the party theme.
- Play with textures: Experiment with different textures in each layer—some can be firmer, while others can be slightly softer for a fun contrast.
Storage and Make-Ahead Tips for the Dino Jello Cups Recipe
Once you’ve assembled your Dino Jello Cups Recipe, proper storage is key to maintaining freshness and ensuring they stay delicious. The best part about this dessert is that it can be made ahead of time, making it perfect for busy schedules or last-minute gatherings.
How to Store the Dino Jello Cups Recipe
- Refrigeration is key: After assembling your Dino Jello Cups Recipe, cover the cups tightly with plastic wrap or place them in an airtight container. Keep them fresh by storing in the fridge (in an airtight container) for 3-4 days—perfect for quick meals later! The cool environment helps the gelatin remain firm and fresh.
- Keep the gummies intact: If you’re adding gummy dinosaurs or other candies, it’s best to add them just before serving to prevent them from becoming too soggy or losing their shape over time. Store the gummies separately if necessary, and place them on top when you’re ready to enjoy.
- Avoid freezing: Freezing Jello can alter its texture, making it lose its smooth consistency. It’s best to store your Dino Jello Cups Recipe in the fridge to maintain their perfect texture and flavor.
Make-Ahead Tips
- Prepare in advance: You can prepare the layers of your Dino Jello Cups Recipe up to two days ahead of time. Simply make the gelatin layers and allow them to set in the cups. When you’re ready to serve, add the gummies and any decorative toppings.
- Perfect for parties: If you’re hosting a party or event, these Jello cups are a great make-ahead treat. Assemble the cups the night before, and they’ll be ready to wow your guests when it’s time to eat.
Recipe Variations: Get Creative with Your Dino Jello Cups Recipe
While the classic Dino Jello Cups Recipe is fun and colorful, you can also experiment with different flavor combinations, toppings, and even the type of gelatin used. Here are some creative alternatives to try:
- Dino Jello Cups with Fresh Fruit: Add a healthy twist by mixing in fresh fruits like berries, kiwi, or sliced bananas. You can layer the fruits between the Jello layers or top the cups with a fruit garnish for a refreshing addition.
- Use Pudding Layers: For a creamy contrast, consider using flavored pudding layers like vanilla, chocolate, or butterscotch between the Jello layers. The pudding will add a smooth texture and rich flavor that pairs beautifully with the gelatin.
- Themed Jello: Customize the colors and flavors of your Jello to fit a specific theme. For example, for a Halloween party, try orange and black Jello flavors with spooky gummies. For a summer party, use tropical fruit-flavored Jello like pineapple or mango with gummy sea creatures.
- Non-Sugary Variations: If you’re looking for a healthier version, try using sugar-free Jello or making your own gelatin using fresh fruit juice and agar-agar. You can also swap the gummy candies with healthier options, such as dried fruit or fruit-based gummy snacks.
- Dino Jello Parfaits: Layer the Jello with whipped cream or Greek yogurt to create a parfait-style dessert. This version gives a creamy texture and is perfect for those who enjoy a richer treat.
Conclusion: Enjoy and Experiment with the Dino Jello Cups Recipe
The Dino Jello Cups Recipe is a fun, versatile, and easy-to-make treat that’s perfect for kids and adults alike. Its colorful layers, playful dino gummies, and customizable variations make it an ideal dessert for parties, celebrations, or even a fun family activity. Whether you stick to the classic recipe or try one of the exciting variations, you’ll love how easy it is to prepare and how delicious it turns out!
Why You Should Experiment
- Quick and easy: This recipe doesn’t require any special equipment or complicated techniques. With just a few simple steps, you can make a treat that everyone will love.
- Healthier options: You can easily adapt the Dino Jello Cups Recipe to fit dietary preferences, such as using sugar-free gelatin, adding fresh fruit, or opting for a pudding base.
- Endless creativity: This recipe is not only delicious but also an opportunity to get creative with flavors, textures, and presentations. Whether you’re preparing it for a birthday, a family gathering, or a fun snack, it’s a recipe you can enjoy making over and over again.
So, gather your ingredients, put on your creative hat, and start experimenting with this delightful Dino Jello Cups Recipe. You’ll be amazed by how easy and fun it is to make this treat, and how it will become a hit at your next celebration!