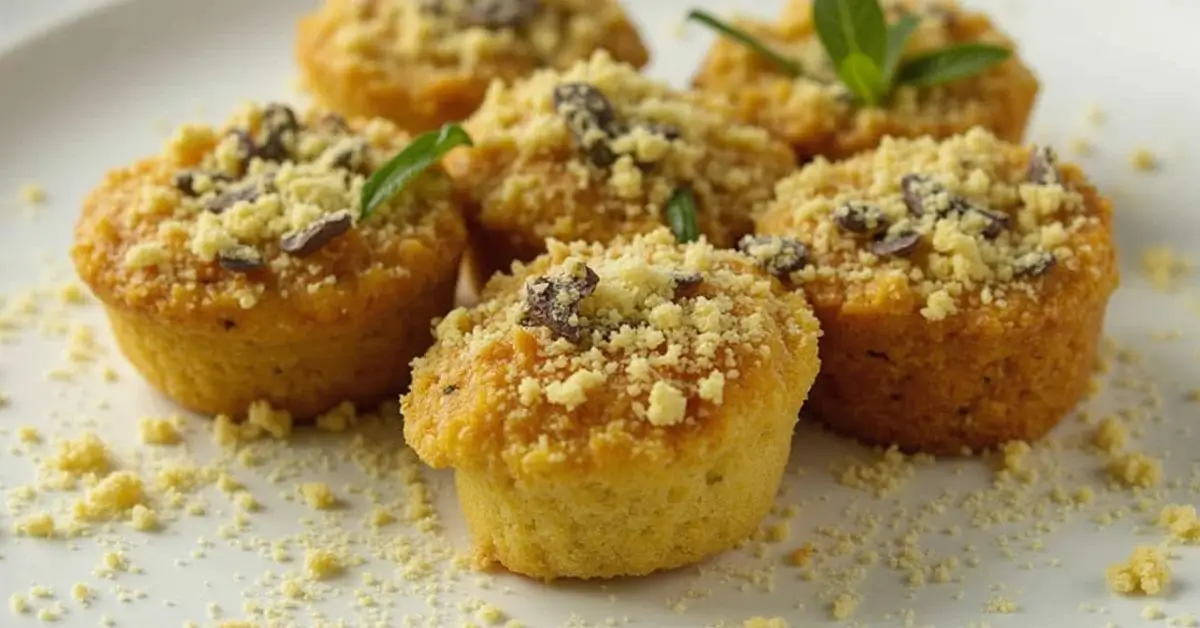
The Secret to Perfect Mini Popovers!
Have you ever wondered what makes a MINI-PPOVER RECIPE so irresistible? Is it their crispy golden exterior, the airy, melt-in-your-mouth center, or the way they pair perfectly with both sweet and savory toppings? If you’ve never tried making these bite-sized delights at home, you’re in for a treat!
Mini popovers aren’t just another baked good; they’re a versatile, quick, and healthier alternative to traditional bread or biscuits. Whether you’re serving them for breakfast, brunch, or a festive celebration, they fit seamlessly into any menu. Let’s dive into why this MINI-PPOVER RECIPE deserves a spot in your kitchen.
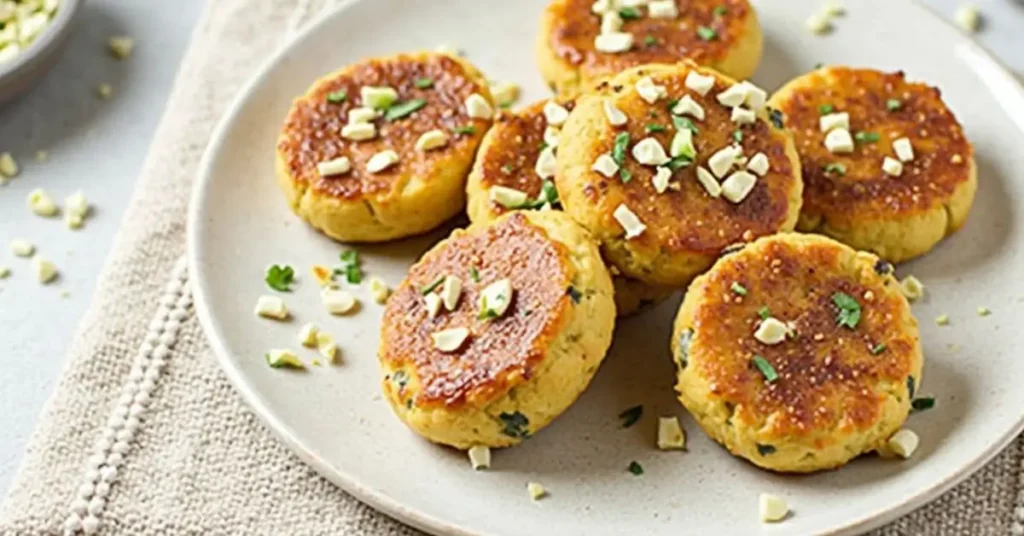
Table of Contents
Why You’ll Love This MINI-PPOVER RECIPE
✔️ Quick & Easy to Make – With just 6 simple ingredients and a total preparation time of 30 minutes, you can whip up a batch effortlessly.
✔️ Healthier Choice – These popovers are naturally low in sugar and rich in protein, thanks to the eggs and milk in the batter.
✔️ Crispy Yet Fluffy Texture – The contrast of a golden, crispy crust with a light, airy center makes each bite unforgettable.
✔️ Perfect for Any Occasion – Whether you’re making a special brunch, a side for soup, or a snack, mini popovers are always a hit.
✔️ Pairs with Anything – Serve them with butter and jam for breakfast, cheese and herbs for a savory twist, or drizzle with honey for a sweet treat.
A Fun and Simple Baking Experience
Even if you’re new to baking, this MINI-PPOVER RECIPE is nearly fail-proof! The key is to use room-temperature ingredients, preheat your muffin tin, and avoid overmixing the batter. Follow these steps, and you’ll have the perfect popovers every time!
So, are you ready to create light, crispy, and absolutely delicious mini popovers? Let’s get started! 🚀
Why This MINI-PPOVER RECIPE Stands Out
If you’re looking for a quick, foolproof, and incredibly delicious baked treat, this MINI-PPOVER RECIPE is exactly what you need! Unlike traditional bread or biscuits that require kneading and long resting times, mini popovers are light, airy, and ready in just 30 minutes.
What makes this recipe truly special? It’s the perfect balance between simplicity and gourmet appeal. You don’t need fancy equipment or advanced baking skills—just a handful of ingredients, a muffin tin, and an oven. Whether you’re making a quick breakfast, a side dish for dinner, or an elegant brunch addition, mini popovers always impress!
⏳ Time-Saving & Beginner-Friendly
Total Time: ⏰ 30 minutes (10 min prep + 20 min baking)
Difficulty Level: ⭐ Super Easy – No Special Skills Needed!
Servings: 🍽 Yields 12 mini popovers
✔️ Minimal Effort – No kneading, proofing, or complicated techniques required.
✔️ Fast Baking Time – Goes from mixing bowl to plate in under half an hour!
✔️ Simple Ingredients – Uses pantry staples like eggs, flour, milk, and butter.
🌱 A Healthier Alternative to Traditional Bread
Unlike heavy biscuits or pastries, this MINI-PPOVER RECIPE is naturally low in sugar and high in protein, making it a great option for a balanced diet.
💪 Rich in Protein – Thanks to eggs and milk, each bite delivers a satisfying dose of protein.
🥛 Dairy Options – Use regular milk, almond milk, or oat milk for a dietary-friendly version.
🥯 Gluten-Free Adaptable – Swap all-purpose flour for gluten-free flour, and it still turns out great!
🥐 Versatile & Perfect for Any Occasion
One of the best things about mini popovers is their versatility. Serve them:
- For Breakfast: With butter, jam, or honey 🍯
- As a Savory Side: With cheese, herbs, or garlic butter 🧄🧀
- With Soups & Stews: A light and crispy alternative to bread 🍲
- For Dessert: Drizzled with chocolate or dusted with powdered sugar 🍫
🎯 The Secret to Success
To ensure your MINI-PPOVER RECIPE turns out perfect every time, remember these simple tips:
✅ Use room-temperature ingredients – Cold eggs and milk can affect the rise.
✅ Preheat the muffin tin – A hot pan helps create that signature popover puff!
✅ Don’t overmix the batter – A few lumps are okay; overmixing can make them dense.
✅ No peeking while baking! – Opening the oven too soon can cause them to collapse.
With minimal effort and maximum flavor, this MINI-PPOVER RECIPE is a game-changer. Whether you’re a baking beginner or a seasoned home cook, these popovers will become a staple in your kitchen. Ready to whip up a batch? Let’s get started! 🚀
The Building Blocks of a Perfect MINI-PPOVER RECIPE
The magic of this MINI-PPOVER RECIPE lies in its simple yet powerful ingredients that work together to create the perfect balance of crispiness and fluffiness. Each component plays a vital role, ensuring your popovers rise beautifully and have that signature light and airy texture.
Whether you’re following the classic recipe or experimenting with variations, these key ingredients will set you up for success!
🥚 1. Eggs – The Structure & Lift
Eggs are the backbone of any MINI-PPOVER RECIPE, providing structure, lift, and a rich flavor. They help create steam inside the batter, which causes the popovers to puff up in the oven.
✅ Tip: Use room-temperature eggs for better aeration and rise.
🔄 Substitution: For a dairy-free version, replace each egg with ¼ cup of unsweetened applesauce or an egg replacer, though the texture may be slightly different.
🥛 2. Milk – The Key to a Smooth Batter
Milk adds moisture, richness, and helps develop that golden-brown crust on the outside of the popovers. It also interacts with the eggs to create a silky, smooth batter.
✅ Tip: Whole milk works best, but you can adjust based on dietary needs.
🔄 Substitutions:
- Dairy-Free: Use almond, oat, or soy milk.
- Richer Flavor: Swap half the milk for heavy cream for a more indulgent texture.
🌾 3. Flour – The Foundation of Structure
Flour gives mini popovers their shape and body. The right amount ensures they are light and airy, not dense or heavy.
✅ Tip: Sift the flour before mixing to avoid clumps.
🔄 Substitutions:
- Gluten-Free: Use a 1:1 gluten-free flour blend for a wheat-free version.
- Whole Wheat Option: Substitute half the flour with whole wheat flour for a heartier bite.
🧂 4. Salt – Enhancing the Flavor
A pinch of salt enhances the overall flavor, bringing out the natural sweetness of the milk and the richness of the eggs.
✅ Tip: Use fine sea salt for even distribution in the batter.
🔄 Variation: Add a sprinkle of garlic powder or smoked paprika for a savory kick!
🧈 5. Butter – Crispiness & Flavor Boost
Butter gives popovers their crispy edges and buttery flavor. It also prevents them from sticking to the muffin tin.
✅ Tip: Melt the butter and brush it inside the muffin cups for extra crispiness.
🔄 Substitutions:
- Dairy-Free: Use melted coconut oil or dairy-free butter.
- Savory Twist: Use garlic herb butter for a flavorful variation.
💡 Bonus Add-Ins & Flavor Variations
Want to customize your MINI-PPOVER RECIPE? Try these fun mix-ins!
🍯 For a Sweet Version: Add 1 tbsp of honey or a dash of cinnamon.
🧄 For a Savory Version: Mix in grated cheese, fresh herbs, or black pepper.
🍫 For a Dessert Popover: Stir in mini chocolate chips or vanilla extract.
🌟 The Secret to Perfect Ingredients
1️⃣ Use fresh, high-quality ingredients for the best taste and texture.
2️⃣ Let the batter rest for 10-15 minutes before baking to help gluten relax.
3️⃣ Always preheat the muffin tin to ensure a good rise.
By understanding each ingredient’s role and how to tweak them, you can make this MINI-PPOVER RECIPE uniquely your own! Now, let’s get baking! 🚀
Step-by-Step Instructions: How to Perfect Your MINI-PPOVER RECIPE
Making the perfect MINI-PPOVER RECIPE is easier than you think! With just a few simple steps, you’ll create light, airy, and golden-brown popovers that are crispy on the outside and soft on the inside.
Follow this detailed guide to ensure flawless results every time. Plus, I’ll share pro tips to help you master the technique!
🔪 Step 1: Gather Your Ingredients & Preheat the Oven
Before you start mixing, set yourself up for success:
✅ Preheat your oven to 220°C (425°F). A hot oven is crucial for the popovers to puff up properly.
✅ Place a mini muffin tin (or popover pan) in the oven while preheating. This helps create instant steam when the batter is poured in, leading to better rise.
✅ Ensure all ingredients are at room temperature. Why this matters: Gentle mixing ensures the batter stays aerated, creating tiny air pockets that expand in the oven for a light, fluffy texture. Overmix, and you’ll deflate those bubbles—no one wants a dense bake!
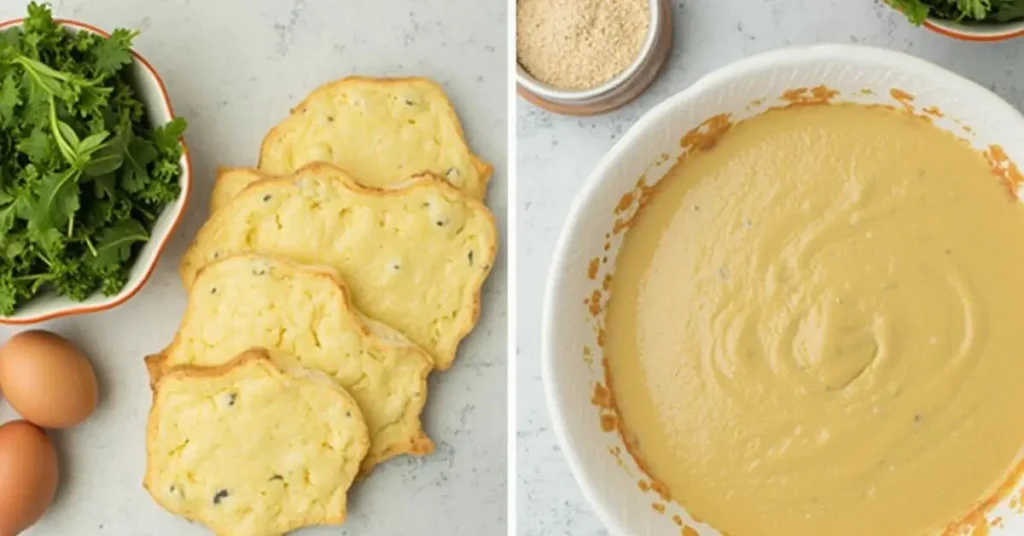
🥄 Step 2: Make the Batter
Now, let’s bring the ingredients together for a smooth, lump-free batter:
1️⃣ Whisk the eggs in a large bowl until light and frothy.
2️⃣ Gradually add milk, whisking continuously to keep the mixture smooth.
3️⃣ Sift in the flour and salt, stirring gently until fully combined. Avoid overmixing—small lumps are okay!
4️⃣ Melt the butter and add it to the batter for extra richness and crispiness.
5️⃣ Let the batter rest for 10-15 minutes to allow the flour to absorb the liquid and improve texture.
💡 Pro Tip: If you want an ultra-smooth batter, blend everything in a blender for 30 seconds.
🧈 Step 3: Grease & Heat the Muffin Tin
To prevent sticking and enhance the crispiness:
✅ Remove the hot muffin tin from the oven carefully.
✅ Brush each cup with melted butter or oil to ensure a crispy crust.
✅ Immediately proceed to the next step—hot tins = better rise!
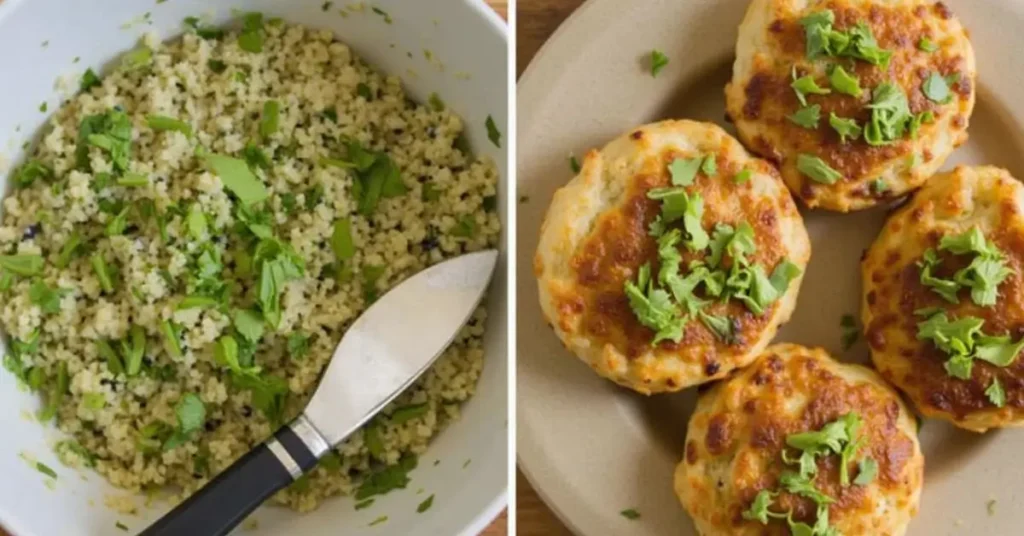
🥮 Step 4: Fill & Bake
Now it’s time to bake these beauties!
1️⃣ Pour the batter into each cup, filling them about ¾ full.
2️⃣ Quickly place the pan in the oven and bake for 15 minutes at 220°C (425°F).
3️⃣ Reduce the heat to 180°C (350°F) and continue baking for another 10 minutes until golden and crispy.
❌ DO NOT open the oven while baking! Sudden temperature changes can deflate your popovers.
❄️ Step 5: Cool & Serve
Once you have finished, carefully remove the tin from the oven and:
✅ Immediately transfer popovers to a wire rack to prevent sogginess.
✅ Serve warm with butter, jam, or a savory filling.
💡 Pro Tip: For extra crispy popovers, poke a small hole in each one to release steam.
🎉 Bonus Tips for the Perfect MINI-PPOVER RECIPE
✔️ For taller popovers: Use a deeper muffin tin or a dedicated popover pan.
✔️ For extra flavor: Add shredded cheese, herbs, or spices to the batter.
✔️ To store leftovers: Keep in an airtight container at room temperature for 1-2 days or freeze for up to month
Perfecting Your MINI-PPOVER RECIPE for a Stunning Presentation
Now that your MINI-PPOVER RECIPE is baked to golden perfection, it’s time to assemble and serve them in a way that makes them even more irresistible! Whether you’re preparing them for a casual breakfast, an elegant brunch, or a fun party appetizer, the right presentation and pairing can take them to the next level.
🛠️ Step 1: Choosing the Right Base for Your Mini Popovers
Your mini popovers are already light, airy, and delicious, but customizing their fillings or toppings can make them even better. Here are a few ways to enjoy them:
1️⃣ Classic Buttered Popovers
- Brush the warm popovers with melted butter for a simple, comforting option.
- Serve with honey, jam, or cinnamon sugar for an extra touch of sweetness.
2️⃣ Savory Mini Popovers
- Fill them with cream cheese, smoked salmon, and fresh dill for an elegant appetizer.
- Add a scrambled egg and crispy bacon for a delicious breakfast option.
- Stuff them with cheddar cheese and jalapeños for a spicy kick.
3️⃣ Sweet Dessert Popovers
- Dust them with powdered sugar and drizzle with chocolate or caramel sauce.
- Fill them with whipped cream and fresh berries for a refreshing treat.
- Stuff them with Nutella or peanut butter for an indulgent bite.
💡 Pro Tip: If you plan to fill your mini popovers, gently cut a small opening at the top or slice them in half for easy stuffing!
🎨 Step 2: Arranging & Plating for the Best Presentation
Presentation is key, especially if you’re serving popovers at a gathering. Here are some creative plating ideas:
✅ Stack them on a serving platter with a dusting of powdered sugar for a simple, elegant look.
✅ Use mini cupcake wrappers to separate different flavors and add a pop of color.
✅ Pair them with a dipping sauce like honey butter, garlic aioli, or chocolate sauce for easy serving.
✅ Serve on a wooden board with accompaniments like cheese, fruit, or spreads for a beautiful brunch display.
🍽️ Step 3: Garnishing for Extra Appeal
To elevate the visual appeal and taste of your MINI-PPOVER RECIPE, consider these garnishing options:
✔️ Fresh Herbs: A sprinkle of chopped chives, parsley, or basil can enhance the flavor and add color.
✔️ Grated Cheese: A little Parmesan or cheddar sprinkled on top before serving gives a delicious finishing touch.
✔️ Powdered Sugar: A light dusting makes sweet popovers look extra inviting.
✔️ Edible Flowers: Great for a high-tea or brunch aesthetic.
🥂 Step 4: Pairing Ideas for the Perfect Mini Popover Experience
Make your MINI-PPOVER RECIPE part of a balanced meal with these perfect pairings:
🍳 Breakfast: Serve with eggs, bacon, and fresh fruit.
🥗 Brunch: Pair with a mixed greens salad and a refreshing mimosa.
🥘 Dinner: Enjoy alongside a warm soup or roast.
🍫 Dessert: Serve with a scoop of ice cream or hot cocoa.
Storage and Make-Ahead Tips for Your MINI-PPOVER RECIPE
One of the best things about the MINI-PPOVER RECIPE is its versatility, not only in flavor variations but also in how you can store and reheat them for future enjoyment. Whether you’re making a large batch for a party or just want to save some for later, here are the best tips to keep your popovers fresh and tasty!
🍞 Storing Your MINI-PPOVER RECIPE
After baking your mini popovers, you can keep them fresh for up to 2 days at room temperature. Here’s how:
Room Temperature Storage:
1️⃣ Allow popovers to cool completely before storing.
2️⃣ Store them in an airtight container to preserve their texture and prevent them from becoming soggy.
3️⃣ Keep them in a cool, dry place away from direct sunlight or heat.
Freezing for Later:
If you want to enjoy your MINI-PPOVER RECIPE at a later date, freezing is a great option! Here’s the best way to freeze them:
1️⃣ Allow the popovers to cool completely.
2️⃣ Place them in a single layer on a baking sheet and freeze them for 1-2 hours.
3️⃣ Once frozen, transfer them to a freezer-safe bag or airtight container.
4️⃣ Label the container with the date for easy tracking.
Popovers can be frozen for up to 1 month.
🔄 Reheating Your MINI-PPOVER RECIPE
When you’re ready to enjoy your stored mini popovers, reheat them carefully to ensure they stay light and crispy:
Reheat from Room Temperature:
1️⃣ Preheat the oven to 180°C (350°F).
2️⃣ Place the popovers on a baking sheet and heat them for 5-7 minutes until warmed through.
3️⃣ Optional: Brush with melted butter for added flavor and crispness.
Reheat from Frozen:
1️⃣ Preheat the oven to 180°C (350°F).
2️⃣ Place the frozen popovers directly on a baking sheet.
3️⃣ Heat for 10-12 minutes or until fully heated and crispy.
Note: Avoid microwaving as it can make them soggy.
Recipe Variations for Your MINI-PPOVER RECIPE
Now that you’ve perfected the basics, it’s time to get creative! Here are some fun and delicious variations of the MINI-PPOVER RECIPE to suit every taste:
Savory Popovers:
- Cheddar & Chive: Add shredded cheddar cheese and chopped fresh chives to the batter for a cheesy, herby twist.
- Bacon & Swiss: Mix in cooked bacon crumbles and Swiss cheese for a smoky, savory bite.
- Spinach & Feta: Incorporate sautéed spinach and crumbled feta cheese for a Mediterranean-inspired flavor.
- Garlic Parmesan: Add a little garlic powder and grated Parmesan for a rich, garlicky taste.
Sweet Popovers:
- Cinnamon Sugar: Before baking, sprinkle a little cinnamon sugar over the tops for a sweet, warm flavor.
- Blueberry & Lemon: Fold in fresh blueberries and a bit of lemon zest for a fruity, zesty popover.
- Apple & Caramel: Fill with sautéed apple slices and drizzle with caramel sauce after baking for an indulgent treat.
Gluten-Free Popovers:
For a gluten-free version, simply substitute gluten-free all-purpose flour for regular flour. You may need to adjust the quantity of liquid to get the correct batter consistency.
Conclusion: Time to Experiment and Enjoy!
The MINI-PPOVER RECIPE is a fun and versatile dish that can be enjoyed in countless ways, whether as a sweet treat, savory snack, or a show-stopping appetizer. Don’t be afraid to experiment with flavors, fillings, and toppings—you have the freedom to make them uniquely your own!
✨ Pro Tip: Get creative with your combinations, and remember that part of the joy of cooking is trying out new things. The next time you make MINI-PPOVER RECIPE, feel free to test different spices, fillings, and presentation styles to make it perfect for any occasion!
We hope this recipe brings as much joy to your kitchen as it will to your taste buds. Don’t forget to share your popover creations with us—who knows, you might inspire someone else to start baking! Happy cooking! 😊